Bath bombs have long been a favorite addition to bath time routines, turning ordinary soaks into effervescent experiences. As their popularity has skyrocketed, many have sought unique ways to make these bath-time delights even more special. Hand painting bath bombs elevates them from merely fragrant fizzies to bespoke works of art.
Hand-painted bath bombs add an unmatched level of elegance to the already luxurious bath experience. These colorful creations combine visual beauty with aromatic relaxation, ensuring both the eyes and the senses are engaged during your bath.
There’s a beauty in personalizing an experience that’s already considered indulgent. Painting bath bombs allows users to infuse personal aesthetics into a sensory experience, transforming it from a mere bath routine to an artful relaxation ritual.
Benefits of Hand-Painted Bath Bombs
Aesthetic Appeal
Hand-painted bath bombs elevate the bathing experience from a simple act to an artistic ritual. The intricate designs and vibrant colors added to bath bombs can make even a mundane bath feel luxurious. When these bombs dissolve, they release not only their scents but also a visual spectacle, making each bath unique.
Personal Touch and Customization
Creating or owning a hand-painted bath bomb means having a product tailored to individual preferences. A plain bath bomb might fizz and fragrance the water, but a painted one adds a personal touch, embodying the creator’s or owner’s individual aesthetic. For those who craft these, each stroke of paint is a testament to their style and personality.
Gift-Giving Potential
Hand-painted bath bombs are excellent gift options. Not only do they offer a relaxing experience, but their personalized nature also conveys thoughtfulness. Gifting a bespoke bath bomb shows the recipient that time, effort, and care went into choosing their present, making it a memorable gift for various occasions.
Prepping the Bath Bomb for Painting
Drying and Hardening Process
Before starting the painting process, ensure the bath bomb is thoroughly dried and hardened. Freshly made bath bombs might be damp or soft, which can lead to smudging or a messy painting process. To prevent this:
- Allow the bath bomb to dry overnight.
- Place in a cool, dry environment away from direct sunlight.
- Avoid stacking them, as this might deform their shape or lead to unwanted impressions.
Choosing the Right Bath Bomb Base
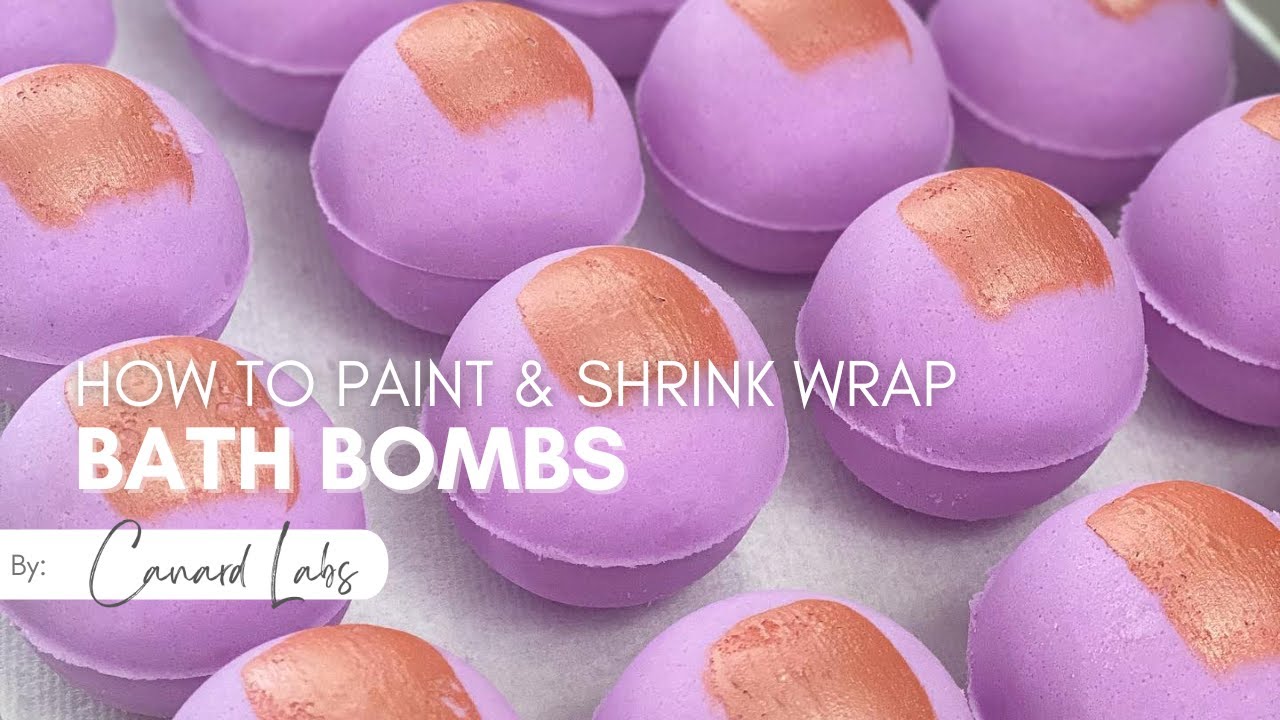
The base color or the bath bomb’s primary hue plays a critical role in the final design. Opt for lighter shades like white or pastel tones if planning on using brighter paints. Darker bases can be ideal for metallic or neon paints. Always remember, a neutral base provides a blank canvas, making the applied colors pop.
Selection of Paints
Food-Grade Colorants
Safety should always be the priority. When selecting paints for bath bombs, always ensure they are skin-safe. Food-grade colorants are ideal as they’re safe for skin contact and won’t cause irritations. These colorants are vibrant, blend easily, and provide a wide range of shades.
Mica Powders and Their Use
Mica powders are shimmery pigments, often used in cosmetics. They’re perfect for adding a sparkling touch to bath bombs. Mix mica powders with a bit of alcohol to create a paint-like consistency. This mixture can then be applied using brushes to give a luminous finish to the bath bombs.
Water vs. Oil-Based Colorants
Deciding between water and oil-based colorants depends on the desired effect:
- Water-based colorants: They’re easy to mix and provide vibrant shades. However, they might activate the fizz in the bath bomb if not used cautiously.
- Oil-based colorants: They give a more muted, pastel effect and won’t trigger the fizzing action. They’re also ideal for creating gradient or ombre effects.
Tools and Supplies
Types of Brushes for Detail Work
The right brush can make a significant difference:
- Fine-tip brushes are excellent for intricate designs and detailing.
- Flat brushes offer broader strokes and are perfect for base coloring.
- Angled brushes help in creating gradients and blending shades.
Remember to clean brushes thoroughly after use to maintain their bristle quality.
Using Sponges for Gradient Effects
For those who want a gradient or ombre effect on their bath bombs, sponges can be incredibly handy. Dabbing a sponge lightly dipped in color onto the bath bomb creates a soft gradient, allowing for a seamless transition between shades.
Importance of a Clean Workspace
Maintaining a clean workspace is crucial. Not only does it ensure hygiene, but it also makes the painting process smoother. Lay out all tools and supplies beforehand, and keep a cloth handy to clean up spills. A neat workspace allows for a clear mind, leading to better designs and a more enjoyable painting process.
Step-by-Step Painting Process
Preparation: Setting up a Proper Workspace
Before you start the actual painting, ensuring you have a dedicated space is crucial. This space should be:
- Free from dust or debris that could stick to the paint.
- Well-lit to ensure you see every detail.
- Spacious enough to lay out all your materials and work without feeling cramped.
Base Coating: Applying the Initial Layer
The base coat serves as the foundation for your design. Here’s how to do it:
- Choose a neutral color that complements your design.
- Apply a thin, even layer on the bath bomb. Ensure no bubbles or uneven patches.
- Allow this layer to dry thoroughly before proceeding.
Detailing: Techniques for Intricate Designs
Detailed designs can transform your bath bomb into a work of art. Here are some techniques:
- Use fine-tip brushes for precision.
- Opt for vivid colors that stand out against the base.
- Practice the design on paper before applying it to the bath bomb.
- Remember, patience is key. Take breaks if necessary.
Drying: Proper Drying Time and Methods
Once you’ve finished painting, drying is vital:
- Place the bath bomb in a cool, dry area.
- Avoid direct sunlight which could fade the colors.
- Ensure good airflow to speed up the drying process.
- Wait for at least 24 hours before using or storing.
Safety Measures
Using Skin-Safe Paints
Your skin’s health is paramount. Always opt for paints that are:
- Non-toxic.
- Specifically labeled as skin-safe.
- Free from harsh chemicals.
Precautions to Avoid Irritation
Even with safe paints, some might have sensitive skin. To minimize risks:
- Perform a patch test on your wrist before bathing with the painted bath bomb.
- Avoid using too many colors on a single bath bomb.
- If any irritation occurs, rinse the skin immediately and discontinue use.
Storing Painted Bath Bombs Correctly
Storage can impact the safety and effectiveness of your bath bomb:
- Use airtight containers to prevent moisture seepage.
- Store in a cool, dark place to preserve the colors.
- Keep them away from other cosmetics or products with strong fragrances.
Maintenance and Longevity
How to Ensure the Paint Doesn’t Fade
To retain the vibrancy of your painted bath bombs:
- Use high-quality paints known for their longevity.
- Store bath bombs individually to prevent color transfer.
- Avoid exposing them to direct sunlight.
Proper Storage to Maintain Vibrancy
Storage plays a vital role in maintaining your bath bomb’s appeal:
- Always store in a dry place.
- Use containers that prevent dust or contaminants.
- Handle with care to avoid chipping the paint.
Tips for Best Results
Mixing Colors for a Unique Shade
Creating unique shades can set your bath bombs apart:
- Use a palette to mix colors before application.
- Start with small quantities to avoid waste.
- Aim for consistency in the paint mixture.
Using Stencils for Beginners
Stencils can be a great guide for those new to painting:
- Opt for adhesive stencils that stick to the bath bomb’s surface.
- Ensure the stencil’s edges are firmly pressed down.
- Use a sponge or brush to apply the paint evenly.
Sealants: To Use or Not to Use?
Sealants can provide an added layer of protection:
- They lock in the color and prevent fading.
- Choose a sealant that’s skin-friendly and non-toxic.
- However, not all bath bombs require a sealant. Evaluate based on the paint used and intended use.
How to Paint Bath Bombs with Mica Powder
Mica powder offers shimmering, vibrant colors, making it an ideal choice for bath bomb painting. Unlike other paints, mica powder blends seamlessly with bath bombs, creating a mesmerizing bath experience.
Benefits of Using Mica Powder
Mica powder isn’t just about the aesthetic. Its properties are particularly suited for bath bombs:
- Non-toxic and safe for skin.
- Provides a lustrous, shimmering finish.
- Highly pigmented, ensuring vibrant colors.
Selecting the Right Mica Powder
When shopping for mica powder, consider the following:
- Color Vibrancy: Opt for shades that are both appealing and vibrant.
- Skin-Safe Labels: Ensure it’s safe for cosmetic use.
- Purity: Avoid mica powders with added fillers.
Steps to Paint Using Mica Powder
To achieve the best results with mica powder, follow these steps:
- Preparation: Ensure the bath bomb is completely dry.
- Mixing: Combine mica powder with a carrier oil (like coconut or almond oil) in a bowl. Start with a small amount and increase based on desired consistency.
- Application: Use brushes or sponges to apply the mica mixture. For more shimmer, apply multiple layers.
- Drying: Allow the bath bomb to dry for at least 24 hours.
- Storage: Store in a cool, dry place to retain the shine.
Painted Berry Bath Bomb Tutorial
Imagine a bath bomb resembling a juicy berry, complete with the sparkle and sheen of freshly picked fruit. This tutorial will guide you through the steps to create a painted berry bath bomb that’s as delightful to look at as it is to use.
Materials Needed
- Bath bomb (preferably in a berry shape or round form)
- Red, blue, and green mica powders
- Carrier oil (coconut or almond oil)
- Fine and medium brushes
- A mixing palette or small bowls
- A clean workspace
Steps to Create the Berry Bath Bomb
Here’s a simplified guide to creating your berry masterpiece:
- Base Coat:
- Mix red mica powder with a few drops of carrier oil. Aim for a paint-like consistency.
- Paint the entire bath bomb with this mixture. This forms the berry’s base color.
- Shading and Detail:
- Mix blue mica powder with carrier oil to achieve a deeper shade.
- Using the fine brush, apply this darker shade to the bottom of the bath bomb and any areas you want to appear shaded or recessed.
- This creates depth and makes the berry appear more three-dimensional.
- Stem and Leaf Detail:
- Combine green mica powder with carrier oil.
- With the medium brush, paint a small stem on the top of the bath bomb.
- Add tiny leaves branching out from the stem using the fine brush.
- Finishing Touches:
- If you want added sparkle, consider applying an additional thin layer of clear mica powder.
- Allow the bath bomb to dry for 24 hours.
- Storage:
- Store your berry bath bomb in a cool, dry place.
With this tutorial, you can create a delightful berry bath bomb that not only looks appetizing but offers a luxurious bath experience. As always, before using any painted bath bomb, ensure the ingredients are skin-friendly and test on a small patch of skin.
FAQs
Why hand paint bath bombs?
Hand painting bath bombs adds a personal touch. When you hand paint them, you’re not just adding color, but also character, personality, and creativity to your bath experience.
What type of paint is safe for bath bombs?
Always opt for skin-safe, non-toxic, and preferably food-grade colorants. This ensures the safety of your skin while enjoying the vibrant designs of the painted bath bomb.
How long do painted bath bombs last?
With proper care and storage, painted bath bombs can last several months without losing their fragrance or visual appeal. Store in a cool, dry place and use within 6 months for the best results.
Conclusion
Personalizing and beautifying daily routines has become an integral part of contemporary self-care. Bathing, especially with the inclusion of hand-painted bath bombs, has evolved into an artistic ritual that merges wellness with creativity.
This art of painting bath bombs, while initially may seem just a whimsical pursuit, is a testament to how much value people place on aesthetic appeal in tandem with functionality. As simple bath products transform into individualized artwork, they reflect our desire for both beauty and relaxation in our everyday lives.
Incorporating such individualized pieces into daily routines speaks to the larger trend of personalization in wellness. It’s not just about the experience anymore, but making that experience uniquely yours. Hand-painted bath bombs serve as an epitome of this blend of art and self-care.